The Stack
- Serverless compute: AWS App Runner (Node.js)
- Serverless data store: Redis via Upstash
- Deployment source: github repo
Project Setup
Create a directory for your project:The Code
In your node project folder, create server.js and copy the below code:This example uses ioredis, you can copy the connection string from the
Node tab in the console.
Deployment
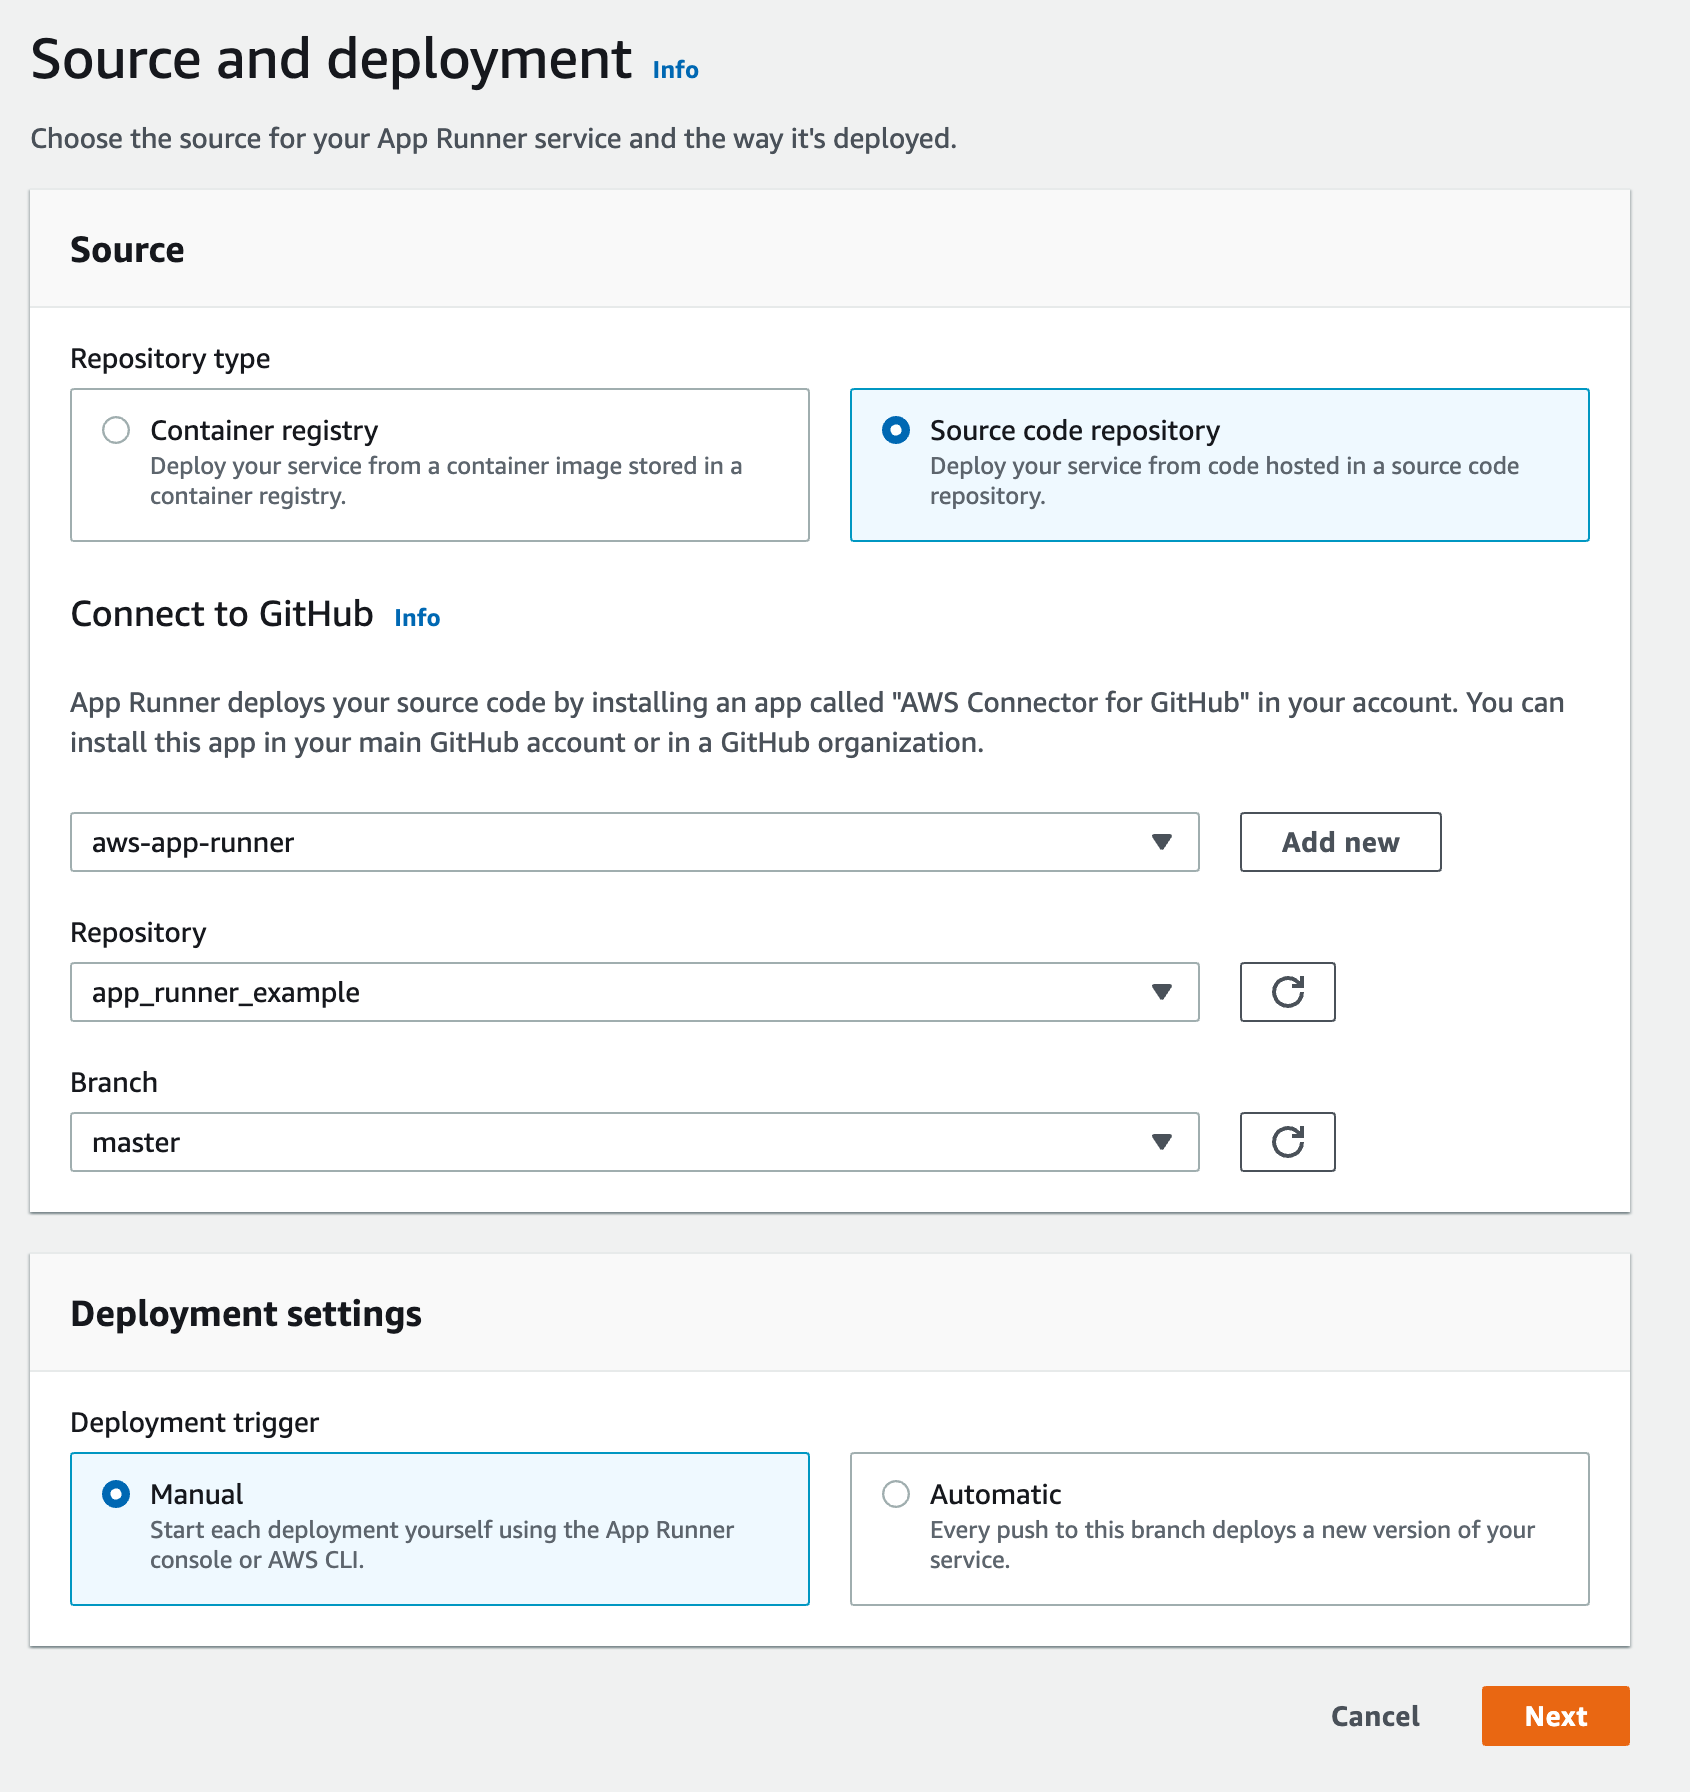
You have two options to deploy your code to the App Runner. You can either share your Github repo with AWS or register your docker image to ECR. In this tutorial, we will share our Github repo with App Runner. Create a github repo for your project and push your code. In AWS console open the App Runner service. Click onCreate Service button. Select
Source code repository option and add your repository by connecting your
Github and AWS accounts.
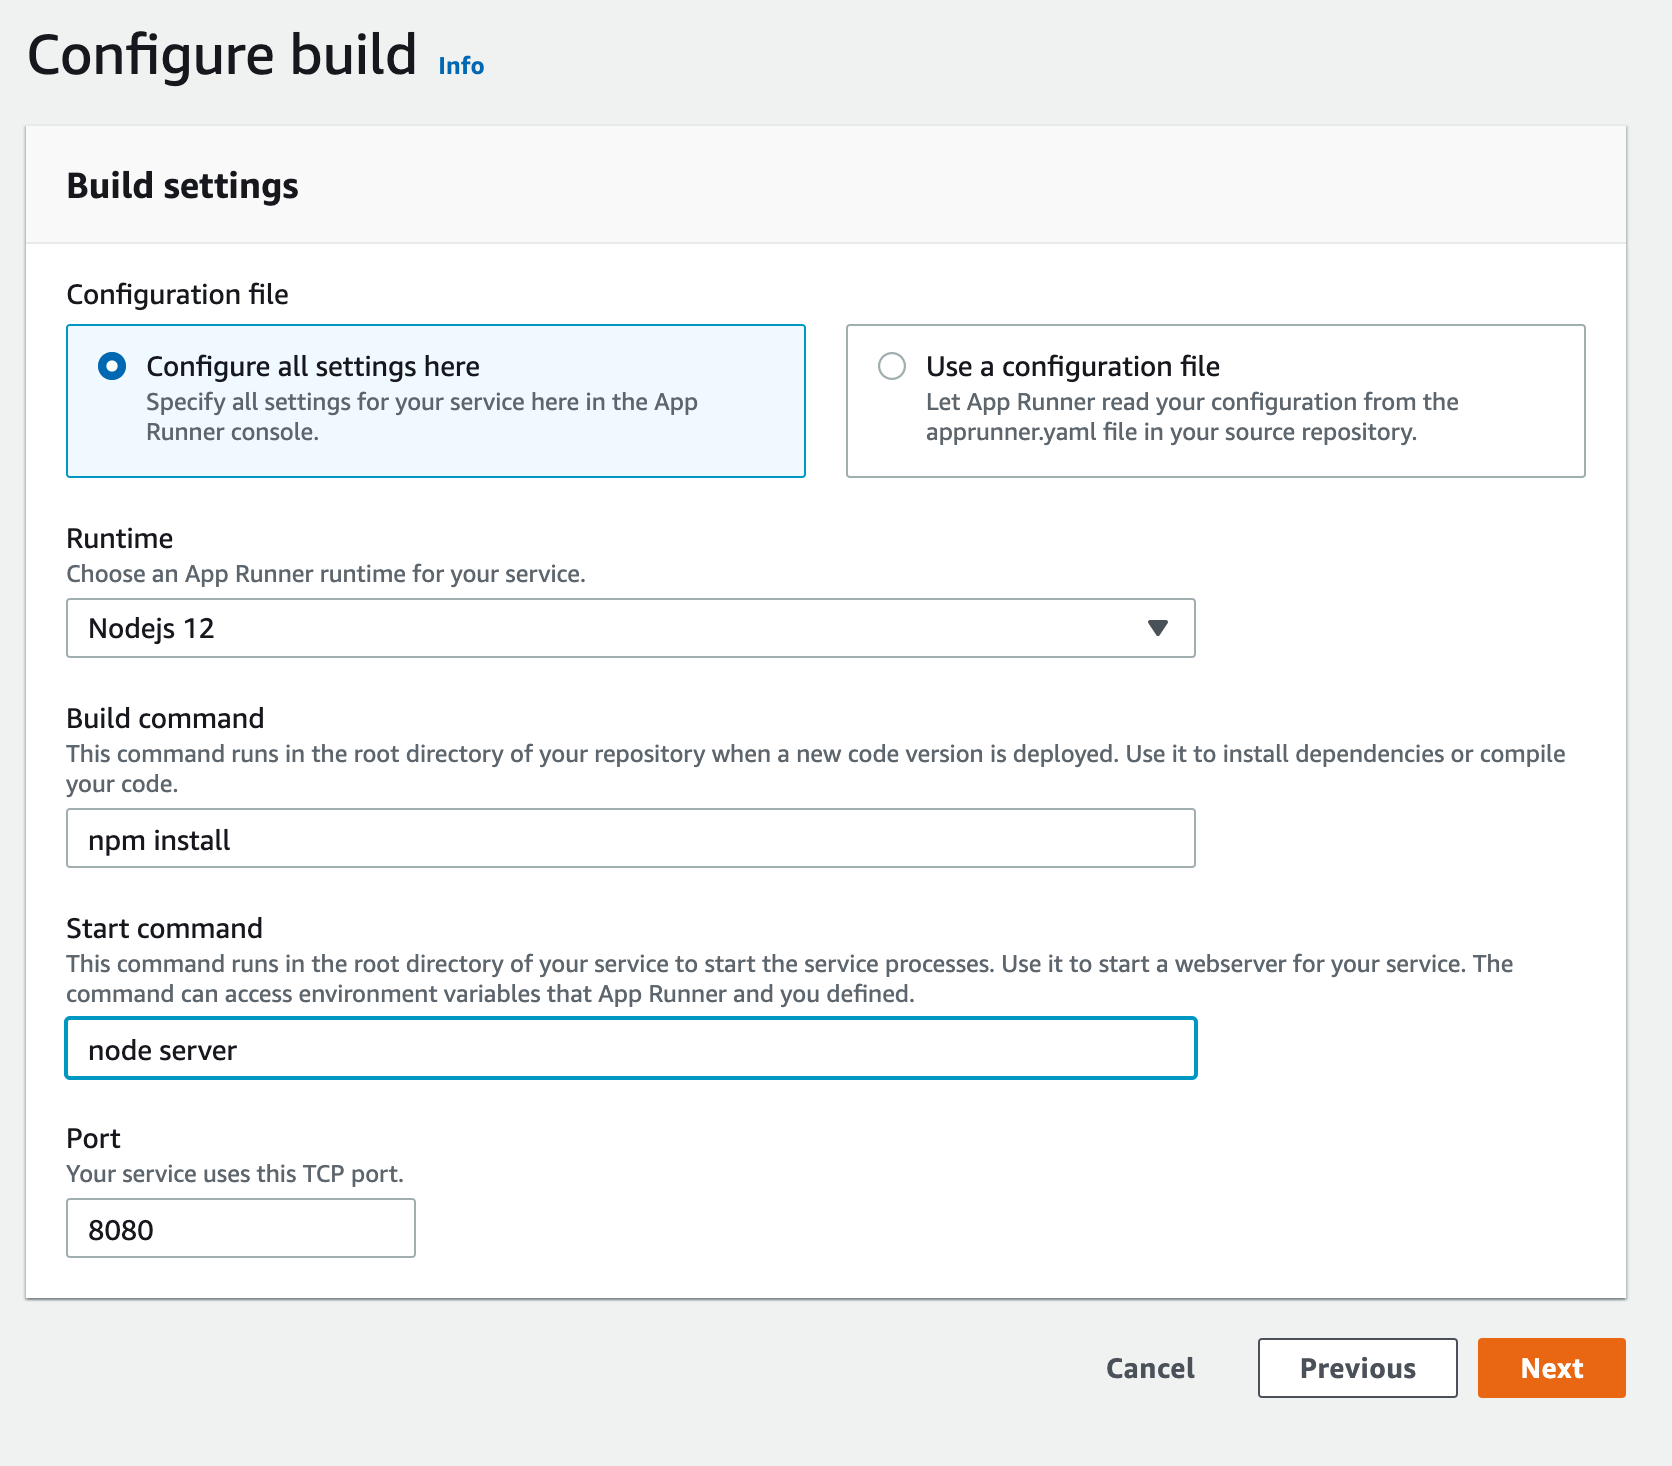
Nodejs 12 as your runtime, npm install as your
build command, node server as your start command and 8080 as your port.
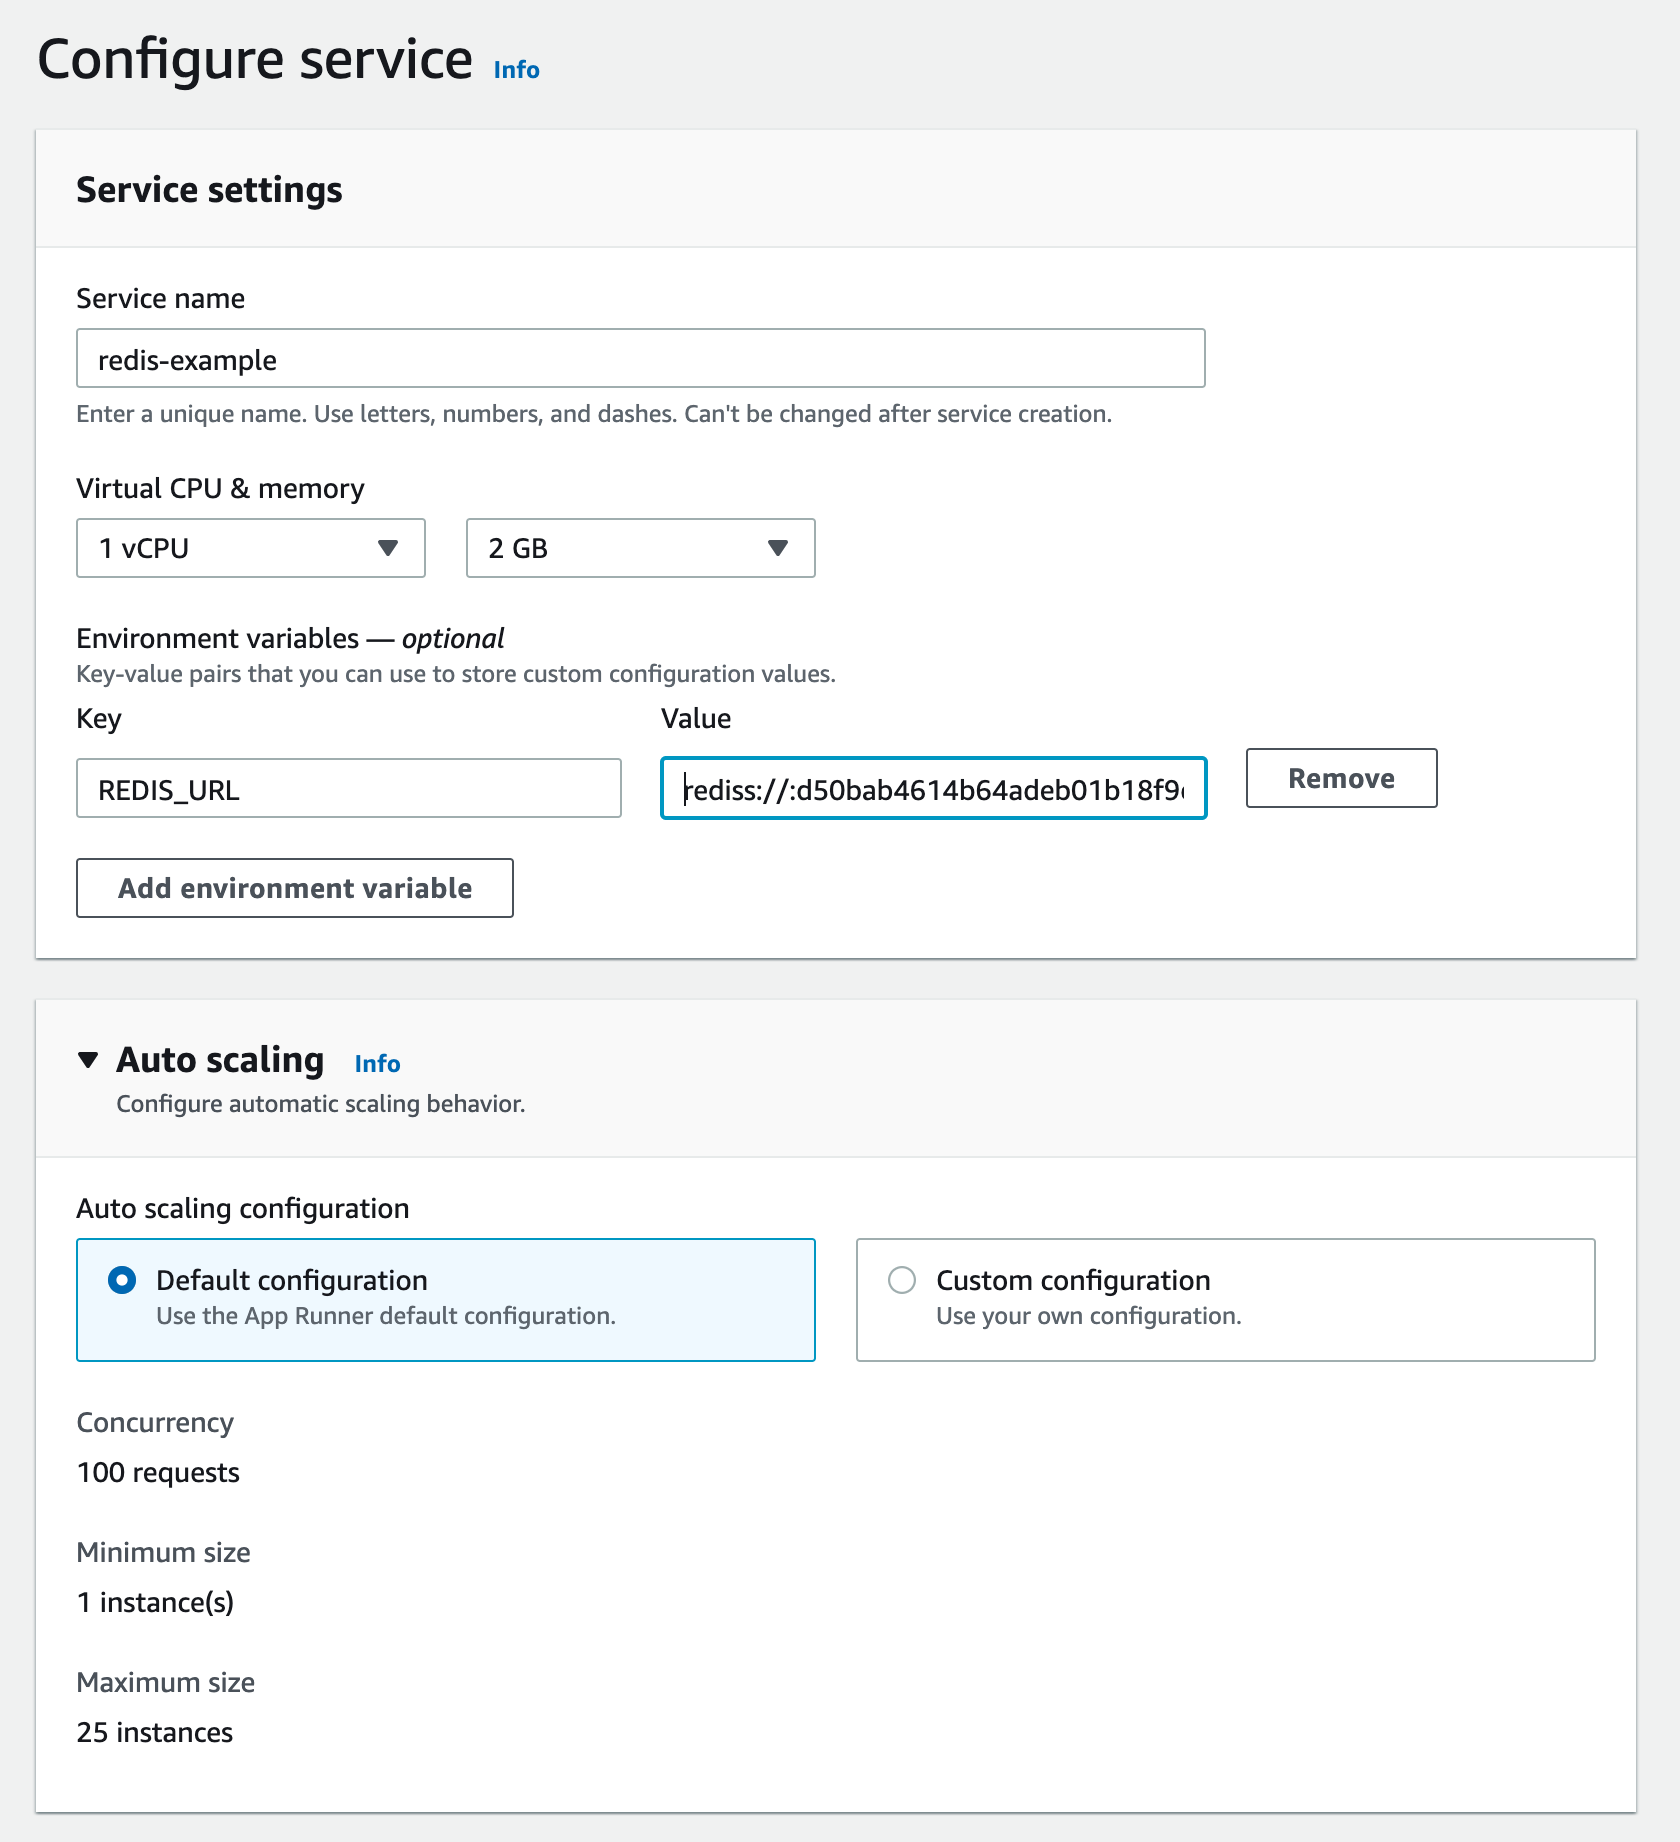
REDIS_URL
environment variable. Your Redis URL should be something like this:
rediss://:d34baef614b6fsdeb01b25@us1-lasting-panther-33618.upstash.io:33618
You can leave other settings as default.
Create and Deploy at the next page. Your service will be ready in a
few minutes. Click on the default domain, you should see the page with a view
counter as here.
App Runner vs AWS Lambda
- AWS Lambda runs functions, App Runner runs applications. So with App Runner you do not need to split your application to functions.
- App Runner is a more portable solution. You can move your application from App Runner to any other container service.
- AWS Lambda price scales to zero, App Runner’s does not. With App Runner you need to pay for an at least one instance unless you pause the system.